
This post explains when homeowners can safely handle mold removal themselves and when professional remediation is necessary. The key factor is the size of the affected area, surface type, and whether the moisture source is known and fixed.
- DIY mold removal works for areas under 10 square feet on non-porous surfaces like tile or glass when the moisture source has been addressed. Proper safety gear including an N95 mask and gloves is required.
- Professional remediation is needed when mold exceeds 10 square feet, affects porous materials like drywall, or results from water damage. Crews use containment barriers and HEPA filtration to prevent spore spread.
- Failed DIY attempts often cost more than hiring professionals from the start because homeowners may spread spores or miss hidden moisture that causes mold to return.
DIY mold removal works well for small, surface-level mold patches under 10 square feet on non-porous materials like tile or glass. Professional mold removal becomes necessary when mold covers larger areas, grows inside walls or HVAC systems, or appears after water damage. Professionals have specialized equipment and training to safely handle toxic mold species and prevent regrowth.
A patch of black spots on your bathroom ceiling looks small enough to wipe away with a sponge. That instinct is right sometimes and dangerous other times. Knowing the difference protects your health, your home, and your wallet.
This post breaks down when DIY mold removal makes sense and when hiring a remediation company is the safer call. You will learn the size thresholds, the hidden risks, and the exact scenarios where scrubbing makes the problem worse.
What DIY Mold Removal Can and Cannot Handle
DIY mold removal is the manual cleaning of small, surface-level mold growth using household products and basic protective equipment. It works for contained spots on non-porous surfaces.
The EPA sets a clear line. If the moldy area is smaller than 10 square feet (roughly a 3-foot by 3-foot patch), most homeowners can clean it themselves.
Good candidates for DIY
- Mildew on grout lines in a shower
- Small spots on a tile backsplash
- Surface mold on a window sill from condensation
- A dime-sized patch on painted drywall from a spilled drink
These share three traits: small footprint, non-porous or sealed surface, and a known moisture source you can stop.
What you need to do it safely
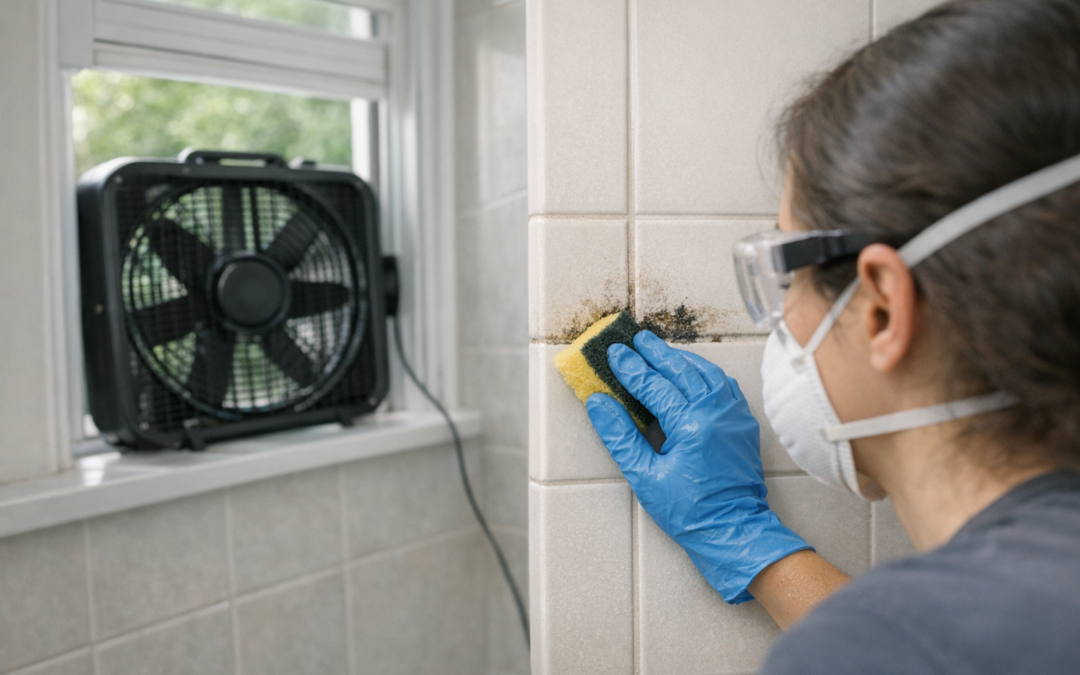
- Wear an N95 respirator, gloves, and eye protection.
- Open a window and run a fan pointed outward.
- Scrub the area with detergent and water, not bleach on porous materials.
- Dry the surface completely within 24 to 48 hours.
- Bag and discard any sponges or rags used.
Bleach is a common mistake. It works on tile and glass but cannot reach mold roots inside drywall or wood.
When DIY Mold Removal Becomes a Health Risk
DIY mold removal turns hazardous the moment you disturb a large colony without containment. Scrubbing releases millions of spores into the air you breathe.

People with asthma, allergies, or weakened immune systems face the highest danger. The CDC links indoor mold exposure to wheezing, coughing, and respiratory infections.
Warning signs the job is too big
- The moldy area exceeds 10 square feet
- Mold spreads across drywall, insulation, or subflooring
- You smell a musty odor but cannot see the source
- Mold returns within weeks of cleaning
- Growth followed sewage backup or flood water
That last point matters most. Mold from contaminated water carries bacteria that home cleaning cannot address.
The hidden-moisture trap
A visible spot on a wall is frequently the tip of a larger problem. We have opened walls in Lakewood homes where a 6-inch surface stain hid three feet of mold behind the drywall.
A slow pipe leak or roof drip feeds growth inside cavities you never see. Cleaning the surface without fixing the source guarantees the mold comes back.
DIY vs. Professional Mold Remediation: A Side-by-Side Look
The decision comes down to size, surface type, and cause. Here is how the two approaches compare on the points that matter.
DIY mold removal
- Cost: $20 to $50 in supplies
- Best for: Under 10 square feet, non-porous surfaces
- Equipment: N95 mask, gloves, detergent
- Risk: Spore spread if the colony is larger than it looks
- Time: An hour or two
Professional mold remediation
- Cost: Varies by scope, often $500 to $6,000
- Best for: Large areas, porous materials, water damage
- Equipment: HEPA air scrubbers, containment barriers, moisture meters
- Risk: Minimal when handled by trained crews
- Time: One to five days depending on scope
Professional mold remediation includes containment, air filtration, removal of affected materials, and moisture correction. A crew seals the work zone with plastic sheeting and negative air pressure to stop spore migration.
Why Water Damage Changes the Answer
Mold from a flooded basement or burst pipe almost never qualifies for DIY. Water wicks into drywall, framing, and carpet padding within hours.
By the time mold appears, moisture has traveled far beyond what you can see. A moisture meter reveals wet material two rooms away from the original leak.
What a trained crew finds that you cannot
- Elevated moisture behind baseboards and cabinets
- Mold colonies inside wall cavities and HVAC ducts
- Saturated insulation that must be removed, not dried
- Structural wood that needs treatment or replacement
Best Option Restoration uses thermal imaging and moisture mapping to trace the full reach of water damage. This step alone prevents recurring mold that DIY cleaning would miss.

 Posted on Google
The Real Cost of Getting It Wrong
A failed DIY attempt frequently costs more than calling a crew from the start. Homeowners spread spores, drive mold deeper into materials, or ignore the moisture source entirely.
One Lakewood client scrubbed bathroom mold four times over six months. When we opened the wall, the shower pan had been leaking the whole time, ruining the framing behind it.
The repair grew from a simple cleanup into subfloor replacement. Early professional mold remediation would have caught the leak and saved thousands.
Questions to ask before you grab a sponge
- Is the area smaller than 10 square feet?
- Is the surface non-porous, like tile or glass?
- Do I know exactly where the moisture came from?
- Has the moisture source been fixed?
- Am I free of respiratory conditions or allergies?
Five yes answers mean DIY is reasonable. A single no means you should call for an assessment.
How Best Option Restoration Approaches Mold
Our crews start with inspection, not demolition. We identify the moisture source, measure the affected area, and test where growth has spread.
Containment comes next to protect the rest of your home during removal. We remove ruined materials, run HEPA filtration, and verify the space is dry before rebuilding.
We serve homeowners across the Lakewood area and respond quickly to water and mold emergencies. The goal is removing mold once, completely, so it does not return.
Making the Right Call for Your Home
DIY mold removal works for small, surface spots on hard surfaces with a known, fixed moisture source. Anything larger, hidden, or tied to water damage calls for trained remediation and proper containment.
When in doubt, an inspection costs far less than a repeated failure. Call or text Best Option Restoration at 303-500-3187, email info@borlakewood.com, or visit https://borlakewood.com for a mold assessment.
Sources
- EPA – Mold Cleanup in Your Home
- CDC – About Mold
- EPA – A Brief Guide to Mold, Moisture and Your Home